Once you’ve signed up to CloudCover 365, the next step would be to setup your backup job.
Firstly, you’ll need to create a backup repository that will house your data.
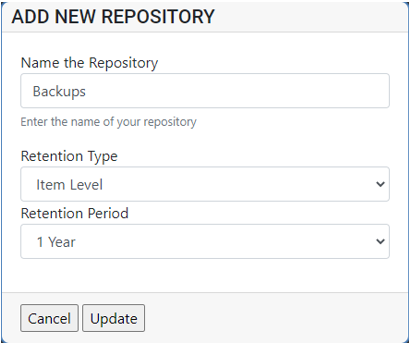
To create the repository, you’ll need to click the New repository button.

From here, you’re presented with a dialogue box that will allow you to name it, select the retention type and how long you’d like to keep the data for.

When it comes to the Retention Type, it presents you with 2 options, Item level and Snapshot based.
Item Level:
Individual items will be deleted from the backup once their creation or last modification date exceeds the data retention period. This is similar to how classic document archive works and is useful if you need to ensure that items are not stored longer than required.
Snapshot based:
Each restore point represents the snapshot (actual state) of each mailbox, library, or folder at the time of the backup. Items will be deleted from backup once the last restore point they are contained within leaves the retention period. This is similar to how image-level backup works.
Once you’ve created the repository, it’s time to configure your backup job.
It’s highly recommended that when creating the job, you create a job for each service, i.e. a mailbox backup job, one for SharePoint and one for OneDrive.
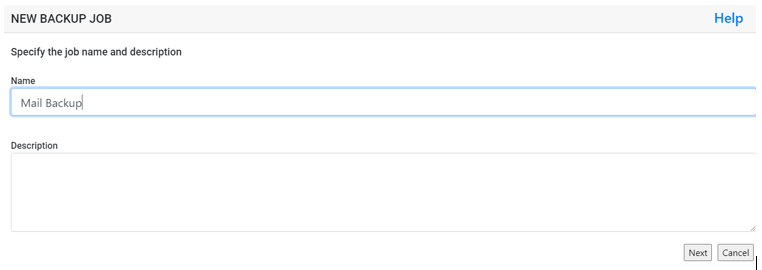
To create the job, click the New Job button.

This will then present you with a dialogue box to name the job and give it a description.

Once the job is named, you can select one of the 3 following options.

Backup entire organisation will backup everything that your organisation has within 365.
Backup some organisation services allows you to select specific services to backup such as Mailboxes, SharePoint sites etc.

The next page allows you to select items that you’d like to exclude from the backup.

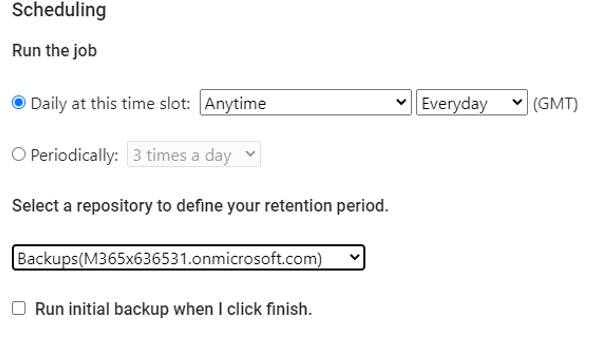
Lastly, you have the option to set the job schedule and select the repository you’d like to send the backups to.

Once you click finish, the backup job will be created and will run on the scheduled stated.

